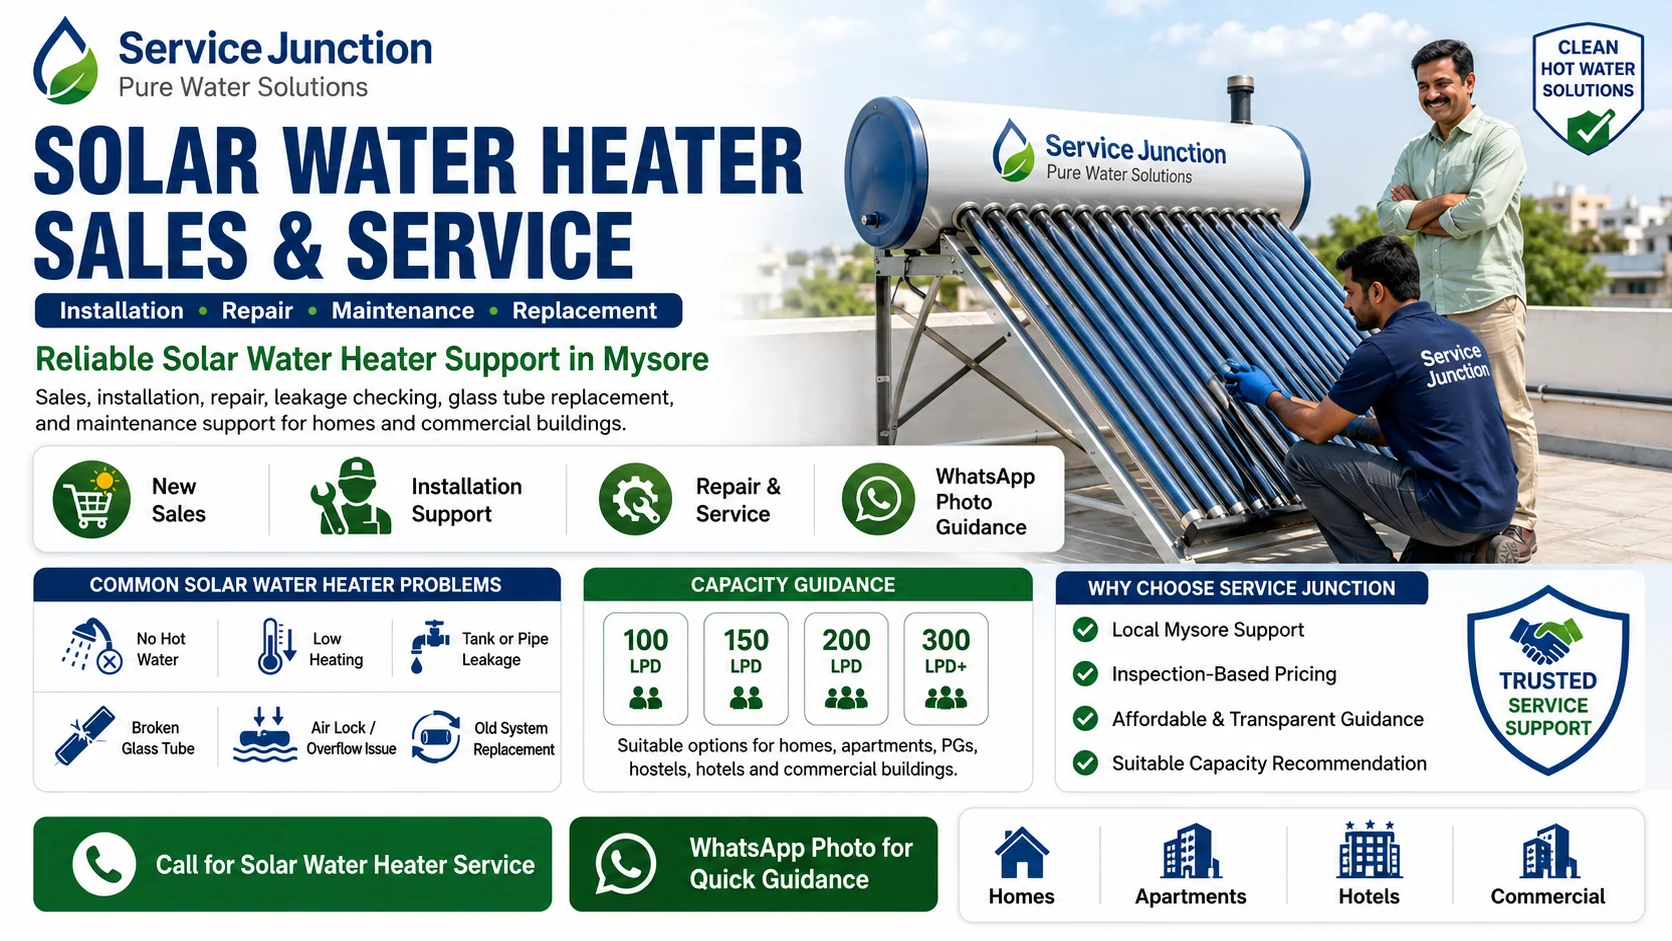
Installation of Solar Water Heating System
Installation of a solar water heating system should be planned after checking roof space, sunlight exposure, water requirement, LPD capacity, plumbing route, tank position and safety access. A correct setup helps the system heat water properly and reduces problems like low heating, leakage, air lock, pipe bending and weak hot-water flow.
Service Junction helps with solar water heating system installation support for ETC and FPC systems, including roof inspection, capacity guidance, tank placement, collector setup, pipe connection, leakage checking and basic working check.
What Is Checked Before Installation?
Before installing a solar water heating system, the site should be checked carefully.
Important checks include:
- Open roof space
- Shade from nearby walls, trees or buildings
- Roof strength
- Safe roof access
- Tank placement area
- Collector direction
- Stand position
- Cold water inlet line
- Hot water outlet line
- Overflow line
- Air vent arrangement
- Plumbing distance to bathroom
- Space for future service and cleaning
A system placed in shade or on a weak roof may create performance and safety problems later.
ETC and FPC Installation
Solar water heating systems are commonly installed as ETC or FPC systems.
ETC systems use evacuated glass tubes to collect solar heat. During installation, tube handling, rubber seal condition, tank level and pipe connection should be checked carefully.
FPC systems use flat plate collectors with absorber plates and glass covering. During installation, collector angle, panel support, pipe insulation and collector surface protection are important.
The right system type depends on water quality, pressure condition, roof space, usage, budget and maintenance requirement.
LPD Capacity Selection Before Installation
LPD means litres per day. Capacity should be selected before installation because tank size, collector size, roof space and plumbing planning depend on it.
Common capacity options include:
- 100 LPD for small family use
- 150 LPD for medium domestic use
- 200 LPD for higher home usage
- 300 LPD for larger homes or shared usage
- 500 LPD and above for heavy hot-water requirement
Choosing a smaller system can cause hot water shortage. Choosing a larger system may need more roof space and higher installation cost.
Roof Placement and Sunlight Direction
The collector should be placed where it gets strong sunlight for enough hours. Shade during peak sunlight time can reduce heating output.
During roof placement, check:
- Whether the collector surface receives open sunlight
- Whether the system is away from roof-edge risk
- Whether future cleaning is possible
- Whether the stand can be fixed safely
- Whether the tank and collector can be serviced later
- Whether pipe routing is short and practical
Collector direction and angle should be planned by the installer based on site condition and product requirement.
Tank and Stand Installation
The storage tank and stand carry the system weight, so installation should be stable.
The technician should check:
- Stand alignment
- Tank level
- Fastener tightness
- Support structure condition
- Roof surface strength
- Tank outlet and inlet position
- Overflow line position
- Accessibility for inspection
An unstable stand or wrongly placed tank can cause leakage, weak flow, safety risk and repeated service problems.
Plumbing Connection
Plumbing is one of the most important parts of solar water heating system installation.
The technician may need to connect:
- Cold water inlet
- Hot water outlet
- Air vent pipe
- Overflow pipe
- Drain line
- Bathroom hot-water line
- Existing geyser line, if required
- Non-return valve or pressure-related fittings, if applicable
Wrong pipe connection can cause cold water mixing, low hot-water output, air lock, leakage or poor circulation.
Pipe Insulation and Heat Loss
Hot water pipes should be planned to reduce heat loss.
Long pipe distance, poor insulation, exposed piping or unnecessary bends can reduce the temperature of water reaching the bathroom.
During installation, check:
- Pipe length
- Pipe bends
- Pipe insulation
- Hot-water route
- Cold-water mixing risk
- Leakage points
- Pipe support and fixing
Good pipe planning helps improve usable hot-water output.
Filling and Working Check After Installation
After installation, the system should be filled and checked before regular use.
Basic working checks may include:
- Tank filling
- Water flow through outlet
- Leak check at joints
- Air vent check
- Overflow check
- Tube or collector seating
- Pipe connection check
- Hot-water line check
- Valve position check
- Electrical backup check, if installed
If electrical backup is connected, coil, thermostat and wiring should be checked only by a qualified person.
Common Installation Mistakes
Poor installation can create repeated complaints even if the product is good.
Common mistakes include:
- Installing in a shaded area
- Wrong collector direction
- Weak stand fixing
- Tank not level
- Bent connecting pipes
- No proper air vent
- Cold water mixing with hot water line
- Poor pipe insulation
- Loose pipe joints
- No space for service access
- Electrical backup handled unsafely
A proper installation check helps avoid these problems.
Installation for New System or Replacement
Installation may be needed for a new solar water heating system or when replacing an old system.
For replacement, the technician should also check:
- Old tank condition
- Old stand condition
- Existing pipe route
- Leakage in old plumbing
- Broken or weak tubes
- Roof damage near old system
- Whether old capacity was enough
- Whether new plumbing correction is needed
Sometimes old pipe correction is required before the new system is installed.
What to Share Before Booking Installation
Before requesting installation support, share:
- Required hot-water usage
- Number of users
- Preferred capacity, if known
- Roof photo
- Roof access photo
- Existing system photo, if replacing
- Distance from roof to bathroom
- Water tank position
- Plumbing line photo, if available
- Whether electrical backup is required
These details help guide the next step before technician visit.
Call or WhatsApp for Solar Water Heating System Installation
Need installation of a solar water heating system?
Call or WhatsApp Service Junction and share your requirement, roof photo, capacity need and site details. Our team will guide the next step for ETC or FPC installation, replacement, pipe connection, leakage check and working test.
FAQs
What is required for solar water heating system installation?
Installation needs suitable roof space, sunlight exposure, tank placement, collector setup, stand fixing, pipe connection, cold water inlet, hot water outlet, overflow line and safe service access.
Which is better for installation, ETC or FPC?
ETC and FPC both can be used depending on water quality, pressure condition, roof space, usage and budget. The correct choice should be made after checking site requirement.
How much roof space is needed?
Roof space depends on LPD capacity, collector type, tank size, stand placement and service access. Larger capacity systems need more roof area.
Why is sunlight direction important?
Solar collectors need open sunlight for heating. Shade from nearby objects can reduce hot-water output.
Can solar water heater installation cause leakage?
Leakage can happen if pipe joints, tube seals, valve connections, tank fittings or overflow lines are not fitted properly. A leakage check should be done after installation.
Is pipe insulation required?
Pipe insulation is useful because it reduces heat loss between the solar tank and usage point.
Can an old solar water heater be replaced?
Yes. Old systems can be replaced if the tank is damaged, tubes are broken, heating is weak, stand is unsafe or repair cost is high.
What details should I share before installation?
Share roof photo, capacity need, number of users, existing system photo if any, water tank position, plumbing distance and whether electrical backup is required.